NoBo Notes
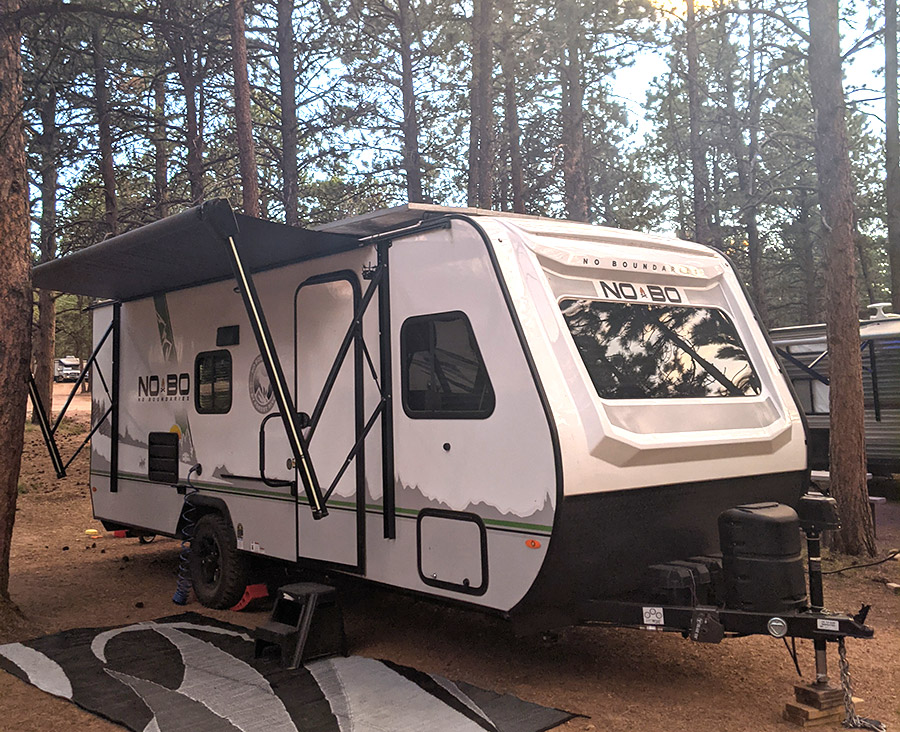
Info on No Boundaries Travel Trailers
Last updated: 06/04/2026
I compiled this info from the Facebook discussion groups while I was researching for my own NoBo. I decided to make it into a public website to share it because a lot of people have the same questions. A lot of this info also applies to the R-Pod, Rockwood Geo Pro, and Flagstaff E-Pro trailers because those are made on the same factory production lines and they share a lot of the same components.
For the products listed there are usually many other similar products available, but I'm mostly just listing the one or two best products that I've found for each item to keep things simple.
Most of this is directly from comments and posts in the Facebook groups and other forums, so the credit for most of this info goes to all the people who have shared helpful advice.
Questions/suggestions/corrections/comments? Contact me at nobo@meplanet.net.
Discussion Groups
- No Boundaries (NOBO) RV Owners - The largest and most active Nobo Facebook group.
- Forest River NoBo Forum
- NoBo 19s - Specifically for 19.x owners.
- NOBO 10.5 & 10.6 Owner Talk - Specifically for 10.5 and 10.6 owners.
- Forest River Owners' Group - Official Forest River owners' group from the parent company of No Boundaries trailers, with a yearly rally event.
- Nobo Sub-Reddit - Reddit group for Nobo discussion.
Information Resources
- Forest River No Boundaries RV Owner's Manual
- Technical walk-thru: https://www.youtube.com/watch?v=b4EvXVnvpMM - Lots of great technical/usage/maintenance info.
- No Boundaries NOBO 19.3 First Look - A detailed walk-thru of a 19.3 with lots of how-to info.
- Forest River Recalls - Search using your VIN number to see if there are any recalls affecting your trailer.
- No Boundaries info video - A good overview of the features of Nobos and how to use it.
Before Picking It Up
- Insurance: When you have the VIN number, contact your auto insurance company to add insurance for the trailer.
Initial Inspection Checklist
Problems to check for before you pick it up from the dealer or private seller.
- Door: Make sure the door opens and closes easily, and locks correctly. Door issues are very common.
- Appliances: Check all appliances, including the A/C.
- Electronics: Plug a phone charger into each of the USB ports to make sure they work. Turn on the TV and ideally try to scan channels to see if it picks up channels (many of the TV antennas have been mis-wired).
- Keys: Make sure keys work for the storage areas, safe, and door.
- Body cracks: Check for body panel cracks around the door frames.
- Shower: Check the shower laminate and the caulking around the skylight in the shower.
- Plumbing: With water in the lines turn on the hot water heater to make sure it works, then make sure the sinks and shower have the hot water on the correct side. Look for leaking water under the sinks, etc.
- Loose items included: Power cord (a 30 amp power cord is included), the JBL portable speaker (may be located inside the safe), the TV remote if it has a TV. A bunk ladder if included in your model.
- Awning: Make sure it opens and closes.
- Cabinets: Check for broken hinges, latches, cracked panels.
- Tank valves: Make sure the gray and black tank valves open and close fully.
- Options installed: Make sure the options you chose are installed (TV, solar, etc.).
- Check the solar battery settings: If you have a solar system pre-installed, ensure that it is configured correctly for the proper battery type. Most trailers will come with "wet" type lead acid batteries, but the controller defaults to the "AGM" type, and the dealers often forget to change it. It's an easy fix, but it's good to check it. The solar controller will say "WET" or "AGM" on the display.
Build Issue Checks
These are build issues that people have come across that are mostly easy to fix but it's a good idea to check them before they become a bigger problem.
- Lug nuts: Make sure the lug nuts aren't loose.
- Spare tire bolts: Make sure spare tire bolts are tight.
- Sink drains: Make sure the drain lines on the sinks are tightened and not leaking. [details]
- Shower drain: There have many many instances of issues with the shower drain leaking underneath. You can remove the vent cover under your shower to see the problem area.
- P-traps: Check the p-traps under each sink to make sure the pipes connections are tightened and not leaking.
- Shore power connector: Check the 30 amp connector for loose wires (fire hazard). "Disconnect all power, remove the 4 outer screws, and it pulls right out. There was plenty of slack in the wire."
- Underbelly foam: Inspect the underbelly and frame for holes and seal any of them with spray foam (Great Stuff foam or similar foam).
Necessary or Highly Recommended Accessories
-
Weight distributing hitch: Pushes some of the weight to the front tires of your towing vehicle and reduces "sway" of the trailer, a potentially dangerous movement of the trailer caused by wind and air movement. A weight distribution hitch is always a good idea regardless of the type of tow vehicle. Note: It seems to be that Nobos with two axles have a 2 5/16" size ball hitch, and Nobos with one axle have a 2" size ball hitch.
- Andersen Hitches No-Sway Weight Distribution Hitch - The most popular option. Doesn't have to be removed to back up. The hitch ball is included (check to see if it matches the ball socket for your model Nobo).
- Blue Ox Sway Pro: 750lb tongue weight or 1000lb tongue weight - Expensive, but sometimes recommended (but not as popular as the Andersen now is). Doesn't have to be removed to back up. Doesn't come with a hitch ball, so you must buy or provide that part. The model to use is based on your tongue weight (hitch weight + extra weight you added to the trailer). You can estimate it as the hitch weight of your model of Nobo plus about 200 pounds.
-
Trailer brake controller: Most trucks with a towing package come with a trailer brake controller. If it doesn't, you have to buy one.
-
Trailer electrical connector: 7 pin electrical connection to operate electric brakes and lights on the trailer from the tow vehicle.
-
Leveling / chock kit:
- Andersen Chock Kit - Leveling and chock kit in one, fast to use. There are other options, but this is the most highly recommended one. Combine it with the LevelMatePRO (see below).
-
Level: To see if your trailer is level.
- LevelMatePRO+ - Wireless device to let you remotely see if it's level. More expensive option, but makes leveling very easy (especially when used with the Andersen Chock Kit like this). Recommended.
- Mobile phone app - There are dozens of phone apps that you can use to use your phone to see if the trailer is level. Search your app store for "bubble level". Most will have a "surface level" mode where you can just lay the phone down on the floor of the trailer.
- Bubble levels - Can be mounted to the trailer. (Or use any regular bubble level and sit it inside the door.)
-
Tongue jack blocks: So you don't have to spend as much time running the tongue jack to the ground, and to keep it from sinking into soft ground.
- Fastway Flip Automatic Fold-Up Jack Foot - Quicker than using blocks. Installation requires drilling two holes in your jack tube.
- Three pieces 2" thick x 6" wide x 10" long pieces of wood. These can also be used under the stabilizers if needed, as extra levelling or chocks, etc.
-
Stabilizer jack blocks: To keep the stabilizer jacks from sinking into soft ground.
- Camco RV Stabilizing Jack Pads
- Or blocks of wood (see the tongue jack blocks).
-
Water pressure regulator: Prevents damage caused by overly high pressure water when connected to an incoming water line.
-
Drinking water hose: A hose that is safe for drinking water. 25 feet should usually be enough, but people recommend getting a second 25 foot hose to also use when needed.
- Apex Zero-G hose - Light weight and easier to coil than regular hoses. "Drinking water safe." Note: Apex also makes an "RV & Marine" Zero-G hose, but it's actually the same thing, just in a smaller 1/2" diameter rather than 5/8", so you might as well get the regular one.
-
Hose elbow: To connect city water hose without straining the hose or connector.
-
Sewer hose: To drain the black and gray water tanks. The most common kits come with a clear elbow and two 10' long hoses and compress to 39" each and fit inside the back bumper of most Nobos (some Nobos reportedly have smaller bumper tubes that may not easily fit a sewer hose). 15' hoses kits are also available (with an optional 5' extension).
- Valterra 20-Foot Dominator RV Sewer Hose Kit - Has good reviews, some say the fittings on this one are less likely to leak over time than the RhinoFLEX.
- Camco RhinoFLEX 20ft Sewer Hose Kit - The most common option. Has good reviews.
- Camco RhinoEXTREME 20ft RV Sewer Hose Kit - The additional feature of this one over the RhinoFLEX is that it is "crush resistant", meaning that if you step on it, it springs back to shape.
- Camco Revolution 20' Sewer Hose Kit - These are made of vinyl and aren't as durable as their Rhino hoses and they also don't stay compressed. But they are cheaper.
-
Black water flush hose: Dedicated hose only used for flushing the black water tank. Choose a unique color (orange, red, etc.).
-
Gloves for handling the sewer hose: Either disposable or reusable waterproof gloves.
-
Appliance vent screens: Screens to keep bugs out of the vents to the fridge, furnace, and water heater.
- Furnace Vent Cover Bug Screens - For the round furnace vents. Note: The newer Nobos may not have the round vents any more, check to see if it's this type.
- Camco Insect Screen for Dometic Refrigerator Vents 20" x 1-1/2" - For the Dometic fridge vents. Secure with zip ties. Note: This is for Nobos with the gas powered fridge. The newer Nobos with a 12v fridge don't use these screens.
- Water Heater Bug Screens
Recommended Accessories
-
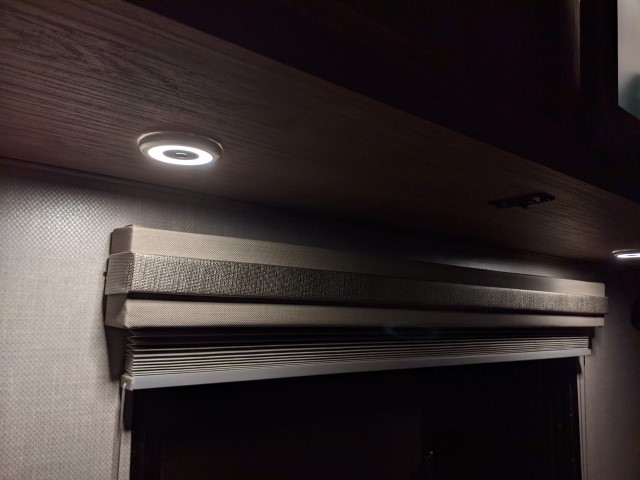
(recommended!) Dimming Warm White Lights - Highly recommended. The factory lights are bright and harsh. These lights are warm and dimmable. It's a good idea to replace at least some of the factory lights with these. The factory lights can be removed by unscrewing the cover (half a turn counter-clockwise), then removing the screws, then install the replacement light. The replacement light is slightly smaller than the factory lights, but you can position them so that the old screw holes aren't noticeable.
-
Drill/driver with sockets: So you can use a power drill to raise/lower the stabilizer jacks. 3/4" size hex socket for the stabilizer jacks. A deep socket is recommended. Also 3/4" and/or 13/16" is the socket size for the tire lugs (varies).
- Scissor Jack Socket Extension bit - Works with any drill, or an impact driver (quick connect).
-
110V plug to 30A adapter: To let you power your trailer by connecting it to a regular 110V household power outlet. Note: But you can't run the A/C that way (30 amp power source needed for A/C use), unless you have an A/C soft-start (mentioned in another section).
-
30A surge protector (EMS): To protect your electrical system in case of a power surge, high or low voltage, or other issues with the power source.
- Progressive SSP-30XL - Often recommended. Also protects from low voltage.
- Progressive EMS-HW30C - More expensive, but is hardwired, so you install it and then it's always in use. Installed: https://www.facebook.com/groups/142222949824016/permalink/552167352162905/
- https://www.campingworld.com/30-amp-hughes-autoformer-power-watchdog-bluetooth-smart-rv-surge-protector-with-automatic-shut-off-emergency-power-off---hardwired-version-117411.html
-
Spare Fuses: In case a fuse blows in the fuse box. Nobos use 7.5, 15, 30, and 40 amp standard size blade fuses. (But if a fuse blows repeatedly, it probably means there is an issue that needs to be fixed.)
-
Leak sealant:
- Dicor self-leveling sealant - For sealing roof leaks.
- Geocel 28100V Pro Flex Crystal Clear RV Flexible Sealant - For sealing around windows and doors (openings on the side walls, not the roof).
-
Hitch lock: To deter theft of the trailer.
- "There's a hole in the hitch you can toss a padlock into so people can't pull up and take it."
- Proven Industries 2" Trailer Coupler lock - Expensive, but the most trusted lock type. If your Nobo has the 2 5/16" hitch ball size, you'll need their 2 5/16" lock instead.
- Master Lock Trailer Lock - Not as secure as the $200+ locks (it can be more easily broken off), but this is a much cheaper option that should be enough to deter thieves looking for an easy target. It's also quicker to use.
-
Hitch ball grease: Protect the hitch ball from friction and corrosion so it lasts longer and the hitch is easier to remove. Almost any grease will work, you could probably also use the same grease as you use for the axles. Note: If you use a Andersen hitch, Andersen does not recommend grease on the hitch ball because their system relies on friction on the hitch ball.
-
Tongue Jack Cover: Some people have had issues with the power tongue jack getting water inside it and rusting and breaking. If you do need to replace the tongue jack, this is a good replacement option: Lippert 285318 3500LB Power Tongue Jack
-
Front window protection: Chips and damage to the front window from rocks while driving is a common issue.
- You can build a removable shield out of various materials. But "window protection film" is easier because you can leave it on all the time and it's invisible. Info video. Contact auto tinting companies in your area or Google "window protection film" followed by your city name. Or you can look for installers of two of the popular options ExoShield and ClearPlex. I called some window tint shops in our area and their quotes ranged from $80-$250 to install window protection on the front window of a Nobo.
- 12 mil security film - You can buy security film and install it yourself. But it does take some work to cut it to size and to apply it. To help with that process you should get a window film installation kit (also available from Home Depots).
-
Mattress: Most people say the factory ones in Nobo trailers are not good. You can add a foam topper, or replace the whole mattress. You may need an RV-size mattress or a regular size mattress depending on what your model uses.
- 3" foam mattress topper - Memory foam topper to go over the existing mattress.
- 4" Gel Textured Memory Foam - An "egg crate" convoluted foam topper to go over the existing mattress if you want an extra-soft topper that you sink into. May work best with the points pointed down.
- 8" memory foam mattress - If you want to replace the entire mattress.
Optional Items and Modifications
Water Items
-
Hose water filter: "This with a 90 degree elbow going into the city water inlet works great." Can also be used when filling the fresh water tank.
-
Metal caps for drain lines: Screw on cast iron caps on the drainage pipes because the plastic ones get knocked off / damaged easily.
-
Sewer treatment: To reduce odors and to help break down waste and toilet paper.
- Happy Campers Tank Treatment - Powder with a scooper.
- Walex TOI-1090250 Porta-Pak Holding Tank Deodorizer Drop-Ins, Sunglow Scent (Pack of 50) - Drop-in dissolving packets.
-
Sewer hose support: Only sometimes actually needed, but some campgrounds require them. Note: Don't leave your black tank valve open continuously, you still need to wait until it's partially full before draining it for it to have enough liquids to drain out properly.
-
Spray hose for the toilet: The Thetford company that made the toilet makes an optional sprayer attachment for it. The water pressure is very low, so it doesn't work very well as a bidet sprayer, but it does give you some water for personal cleaning or for cleaning the toilet bowl.
-
Ceramic toilet: The toilet can be upgraded for a more durable and comfortable ceramic toilet.
- Dometic 320 - Note: This one may not fit in some newer Nobos. Verify the dimensions to see if it's compatible.
- Dometic 310 - Should fit in smaller spaces if the 320 doesn't fit.
Electrical/Electronic Items
-
LED bulb for the stove vent fan: The vent fan above the stove even on new Nobos apparently uses an inefficient incandescent bulb which draws probably 18-20 watts of power (and probably producing about 250 lumens of light). It can be replaced with an LED bulb using a fraction of the energy. The bulb type is "921" or "wedge base".
- LeMeng Bulb 5 watt 2700K Warm White 500 lumens - Rated for about twice as much light output as the original bulb. Note: The newer Nobos may use a different bulb, check to see if it's compatible.
-
Backup camera:
- Three "running lights" are required in the back, so install the camera under the center light, or if replacing the center light, get a camera that has a running light built into it. Such as this one.
- "Haloview system. Have not installed it yet but tons of positive reviews and lots of features at a reasonable price sold us."
- New model Nobos now come with a Furrion brand camera mount and wiring. Some may come with a camera already installed. Note: The tow vehicle's lights (or parking lights) need to be turned on to power the camera.
- Furrion Brand Cameras - Their cameras are outdated low quality cameras (720x480) and they charge more than other brands that are better quality. See other options below.
- Haloview MC7108 - 7" screen, high quality (1920x1080) camera. Not quite as inexpensive as a generic one like the DoHonest one below, but Haloview is a well known brand with a good reputation.
- DoHonest FHD 1080P Backup Camera - 7" screen, high quality (1920x1080) camera.
-
EasyStart for A/C: Lowers the power-draw needed when the A/C first starts up. Makes it possible to run the A/C on 110V (20 amp) regular house outlet power (some say they are able to run the A/C on regular outlet house power without it, but it varies), or a Honda EU2200i generator (or a 2500+ watt non-Honda generator), as long as nothing else is on. Also makes the A/C startup quieter.
- Micro-Air EasyStart 364 (ASY-364-X20-IP) - Info video https://www.youtube.com/watch?v=cjLzqmUmTcM
- "Only use the EasyStart. The cheap soft start capacitors don't work."
- Coleman-Mach Soft Start Kit https://parts.unitedrv.com/products/coleman-mach-soft-start-kit-1497-3601. A cheaper alternative to the EasyStart. Appears to work similarly.
-
Generator: You may want a gas (or propane) generator to be able to use power devices when the trailer isn't hooked up to electric power (including high power devices like the A/C and microwave).
- A 3000+ watt generator: Examples include the Predator 3500 and the Craftsman 3000i.
- Honda EU2200i with an EasyStart device for the A/C: The Honda EU2200i is a popular generator because it's very small, quiet, and very reliable. But it doesn't put out quite enough power to start the A/C because the A/C requires a lot of power during the first few seconds of startup. But it does work if you install the EasyStart device (see above).
-
Wifi extender: To improve wifi reception. Wifi is the internet service provided by campgrounds, etc. It's not the same thing as the mobile phone network.
- QAV - Goes with the factory-installed antenna on most models, but everyone says don't get it, it doesn't work. https://www.forestriverforums.com/forums/f2/qav-wi-fi-booster-anyone-use-one-202981.html
- WifiRanger - Has models with wifi extenders and also LTE modems (mobile hotspots using mobile phone networks). Note: The company was bought by Winegard and it's unclear what products they'll have available in the future.
- Winegard ConnecT 2.0 - Roof mounted wifi extender. They also have a model that has a cell phone network modem in addition to the wifi extender.
- ALFA Network WiFi CampPro 3 from TenchnoRV - Can be used without permanently attaching it to your roof if you don't want it to be permanent. Can be attached with a suction cup mount. Or PVC pipe can be used to increase the height for better reception.
-
Mobile phone signal boosters: Good general info on RV internet options: https://www.youtube.com/watch?v=5nU4p9dNudA
- weBoost Destination RV - This is the latest device from weBoost to amplify the mobile data signal for better cell phone data reception.
-
Propane tank monitor: Not absolutely necessary to have, but convenient to be able to check your propane tank level.
- Mopeka Propane Tank Sensors made by Mopeka. And the stabilizing ring to provide space for the sensor to mount underneath the tank is recommended (one for each tank).
-
Tire pressure monitoring system (TPMS): So you can get a warning alarm if you trailer tire pressure isn't normal. If you towing vehicle doesn't have its own tire pressure monitoring system, you may want to get a system that can monitor all tires of both your vehicle and the trailer. (Note: Newer model Nobos may come with a tire monitoring system.)
- Tymate Tire Pressure Monitor M7-3
- Tymate Tire Pressure Monitor M12-3 - Upgraded version with a larger screen and larger solar panel.
-
TV streaming: Options to stream video from a phone to the TV.
- Chromecast with GoogleTV - Tech reviewers say Chromecast with Google TV is the best streaming device currently available with more features and a lower price. You can stream content from your phone/laptop by connecting to the Chromecast's "wifi beacon" to connect to it directly even if you don't have a wifi router or hotspot. See https://www.cloudwards.net/how-to-use-chromecast-without-wifi/.
- Lightning plug to HDMI adapter - An option for iPhones to connect the phone to the TV with a cable.
- Roku, Amazon Fire Stick, Apple TV - Other streaming options. These require a wifi hot spot (such as from your phone).
-
Two batteries: Extra power for boondocking. "You should always purchase two identical batteries at the same time. Same company, same group, same date.". You can use two 12V batteries wired in parallel, or two 6V batteries wired in series.
-
50A plug to 30A adapter: In some cases the only available outlet may be the 50 amp type outlet (uncommon, but it can happen). In that case you can use a 50 amp to 30 amp adapter to plugin the Nobo 30 amp style cord.
-
Thermostat Upgrade: Some people prefer to upgrade the thermostat to a nicer/fancies one.
- EasyTouch RV™ Thermostat - A touchscreen one. Use the "WHICH MODEL DO I NEED" link to find out which one you need to work with your A/C.
-
Lithium (LiFePO4) batteries: Most Nobos come with lead acid batteries (unless you get the "Unplugged Package" that is now available from Forest River). Some people choose to upgrade to lithium batteries because they offer a lot more power and they weigh less. These are some things to be aware of if you are thinking about switching the lithium:
- Lithium batteries have been getting much cheaper. Battle Born batteries were considered to be the highest quality option, but they're also the most expensive. Less expensive alternatives have been increasing in quality, such as Vatrer. Be sure to get one that has a feature to shut-off automatically in freezing temperatures to protect the battery (or a self-heating option).
- Even with several lithium batteries, it's still generally considered to be not worth trying to run the A/C on batteries (a gas/propane generator is still a better choice for that).
- Lithium batteries should not be charged in freezing temperatures or they can be damaged. For that reason, in cold climates most people move the batteries to the inside of the trailer.
- The Go Power solar controller that comes with solar Nobos can support lithium batteries, you just need to change the settings on the control panel to change the battery type.
- The stock DC converter (battery charger) that comes with Nobos is not designed for charging lithium batteries. So you'll need to replace the DC charger with a lithium compatible one. Update: The converter in newer model Nobos might support lithium. Check for a switch to change to lithium, or the newest ones might be auto-detecting.
Kitchen Items
-
Paper towel holder: You can mount it to a sidewall of a cabinet, under a cabinet, or maybe underneath the outer edge of a table as an alternative option.
- Kamenstein Perfect Tear - Has a gentle "ratcheting" system that should prevent the roll from unwinding while traveling.
-
Hand towel bar:
-
Dinnerware:
- Corelle Bowls, Corelle Plates - Corelle is a popular choice because they're lightweight, durable, and not plastic (they're made of a special type of glass).
- Enamelware - Pretty much unbreakable, and lightweight.
-
Shelf liners: To keep the shelves from getting damaged and to keep stuff from sliding around as much.
-
Kitchen faucet replacement: The kitchen faucet that comes with Nobos tends to splash water a lot because of the high height of the spout, so some people replace it. (Newer year Nobos starting around 2022 may already have a better faucet.) Most standard single-hold kitchen faucets will work, but avoid ones with a long hose (not enough room under the sink).
-
Kitchen Sink Soap Dish / Sink Organizer
-
Peel and stick backsplash: You can use peel and stick tiles to change the look of the kitchen.
-
Utensil holders / misc storage:
- Command Caddy - Medium/Large
- Under cabinet drawer
- Sliding Basket Organizer - May fit in one of the cabinets (check the dimensions).
- Utensil basket
-
Plate/bowl holders:
-
Tension rods: Useful to have to hold items in place in any shelf, or the refrigerator, etc. so the items don't fall out while the trailer is moving.
-
Trashcan:
- iDesign Over the Cabinet Waste Basket or Storage
- Small Foot Pedal Trash Can - You can just put a small trash can under the table or other places in the trailer. This is a sturdy one that won't fall over even while driving.
-
Over cabinet towel bar:
-
Refrigerator thermometers: Useful to see if the fridge/freezer is cold enough.
-
Refrigerator safety latch: Some people have had incidents where the fridge became unlatched while driving, and that results in a mess. A child safety latch is a good way to make sure it stays closed when traveling.
-
Lighter for the stove: (Needed for older model stoves, but the new ones come with a built-in igniter.)
- Utility Lighter Assorted Colors - Regular lighter
- RONXS Lighter - Rechargeable electric lighter.
- ALLY Tools Triple Flint Striker - Flint striker.
Bathroom Items
-
Bathroom faucet replacement: The bathroom faucet that comes with Nobos is very low quality with small round knobs. You may want to replace it with an easier to use lever handle faucet. Any standard 4 inch centerset bathroom sink faucet will work.
-
Bathroom sink replacement: Some models have a cheap round sink in the bathrooms. It can be replaced with a better quality stainless sink.
-
Toilet paper holder: You could use screws with wall anchors, but the self-adhesive toilet paper holders work well.
-
RV Toilet paper: Toilet paper that breaks down quickly in water. Special RV toilet paper is an option, but some regular toilet paper works just as well and regular toilet paper is usually cheaper and probably softer. You just need any toilet paper that breaks down in a reasonable amount of time in water. You can test them yourself by putting some in a cup of water and see how long it takes to break down.
- Charmin Ultra Soft - One recommended option for toilet paper that breaks down especially quickly. [source]
-
Showerhead replacement:
- Oxygenics shower head - Often recommended. Low water use.
- Oxygenics Fury - Newer upgraded version.
-
Shampoo/soap dispenser: Convenient for the shower.
-
Bathroom door hooks:
-
Command Caddy: For toothbrushes, etc.
-
Mirror: These lightweight mirrors can be hung using Command velcro strips.
Misc Interior Items
-
Fans: For the beds, etc.
-
Small Clip on Fan - A USB clip-on fan. Useful for the beds, etc.
-
Sirocco II Fan - These can be wired to a 12v power source, so you can remove one or two of the ceiling lights and replace them with these fans. They're expensive, but they're high quality.
-
Caframo Bora Fan - A smaller fan, also from Caframo. Also high quality.
-
-
Bunk ladder: (Newer Nobo models may now come with a bunk ladder!)
- Stromberg Carlson LA-460B 60” Black Bunk Ladder - "Had to trim a couple of inches off. Nice to be able to remove it."
- Playkids Rock Holds (12 Pack-Small) - Using climbing holds.
- https://www.facebook.com/photo.php?fbid=10106069391737257 - Ladder built from pipes.
- Stainless Steel Folding Step Assist Grab Handle
- Rope ladder - A rope ladder is another option.
-
(recommended!) Divider curtain: For sectioning off the bed or other areas.
-
Central vacuum bags: (For models that have the central vac.)
-
Vacuum accessories: For models that have the central vac.
-
Shelf securing devices: To keep stuff from falling out of the shelves when driving.
-
(19.7) Larger table:
-
Wall anchors: Ways to fasten things to the interior walls.
- Command Strips - Adhesive strips to stick items to the walls (removable, won't damage the wall).
- Hollow-door Toggle Anchors - For heavier items, anchors like these that are designed for hollow doors work well for RV panel walls. Or these ones from Home Depot. In some cases the plastic anchor can spin when you try to screw/unscrew the screw. To avoid that issue, add a dab of glue or hot glue behind the head of the plastic anchor before you insert it so it stays in place.
-
Tracking device: A way to track it if the RV is ever stolen.
-
Insulation improvements: The walls and celing are insulated, but parts of the trailer aren't insulated at all.
- Insulation Mat 79 x 20 Inches for Automotive - This can be used to insulate the wheel wells on the inside of the trailer. The wheel wells are just thin aluminum and they transmit heat very quickly.
Misc Exterior Items
-
Vent fan cover: This allows you to use the vent when it is raining or leave it open while driving.
- Maxxair Vent Cover - "the Max Air Fanmate ezclip is the one that fits correctly without hardware other than 4 cotter pin type clips." You can also add a bug screen (it has to be tied on with zip ties).
-
Siphon roof vent caps: Intended to help draw fumes from the waste vent pipes out of the RV.
-
Keypad door lock: For convenience. Keyless entry key fob and/or keypad.
- RVLock V4 Keyless Entry - Most popular option, works with either the keypad or a key fob.
-
Gutter extenders: They direct water from the gutters farther away from the side to avoid black streaks on the RV from water running down it. (Newer model Nobos now come with gutter extenders already installed.)
-
Bumper sewer hose caps: To make it easier to store the sewer hose inside the Nobo bumper.
- Camco No Insect Bumper Cap with Saver - The metal leash on it is so you don't lose it if it pops off.
-
Exterior shower: Some models don't come with an outdoor shower, and there are reports that they're no longer putting the outdoor shower box on new Nobos. Installation involves cutting a hole in the side at the sink, and using SharkBite pex connectors to tee into the hot and cold water lines.
-
Stepladder mats: To clean your shoes when going up the steps.
-
Stairs alternative: A lot of people have difficulties with the stairs because the feet on the stairs have to be adjusted to make the stairs level with the ground. Some people remove them and use something else instead.
-
Awning Sun Shade: You can add a sun shade that hangs down from your awning to block the sun when the sun is low in the sky and your awning above isn't providing shade. It slides into a groove on your awning bar.
- Shadeidea RV Sun Shade - Select a size that is the same size or smaller than your awning.
-
Entry door clear window and shade: (Newer models may now have clear glass already.) Makes door window clear and gives you a shade. Have to break old window frame to remove it.
- AP Products 015-201512 Slim Shade - Can also install it upside so the shade is top-down for light but some privacy.
-
Replacement cam locks: For keyless use of the outside compartments.
- Admiral Locks Combination Cam Lock - Combination locks.
- Swing Knob Turn Cam Lock - Replace outside shower door key with a knob that doesn't require a key (for models that have an outside shower).
-
Upgraded stabilizers: Most people say the factory ones are not good.
-
Lift Kit: To raise the trailer to have more ground clearance if you have issue with it bottoming out on sloped driveways or rough back roads. Note: Forest River now also offers a "Beast Mode" suspension system option for new Nobos.
- Lippert Axle Riser Kit - This seems to be no longer available. See install video.
-
Protective cover: There are mixed opinions on whether using a cover for it when you're storing it is a good idea. But if you do get a cover for it, it's important that it's one that can breath and not trap moisture (a tarp isn't recommended).
-
Dehumidifier: A dehumidifier can be useful to remove moisture build up in the winter, and it may be a good idea to run it while the trailer is in storage in humid areas. You can have the hose empty into the sink.
-
Spare tire bracket replacement: Some people have had issues with the spare tire bracket bending or breaking. The replacement bracket is heavier, so you'll need to also add bumper support if you replace the bracket (see below).
-
Bumper support bracket: Some people have had issues with the rear bumper falling off.
-
Pest Control: For rodents you just have to make sure all openings larger than a quarter are sealed up. For crawling bugs, the only points it touches the ground are the jack and the tires, so we spray those with a repellent bug spray every several months. Scientific tests show that ultrasonic pest repellers don't work at all for bugs, and only maybe sometimes work for rodents, so those are probably not worth using.
Camping / Non-trailer Items
-
Outside propane grill: Connect it to the propane connection under the trailer (usually located on the side near the door) with a quick connect hose and adapter.
- Blackstone 17" Griddle - This is a griddle, which means it has a solid surface rather than a grate. So you can cook a wider variety of foods on it, such as pancakes and hash browns. Get a quick connect hose and adapter to connect it to the Nobo gas port.
- Weber Q 1200 - A portable grill with open grates for people who prefer grill marks and cooking over an open flame that allows fat to drip through. You can also get a small griddle surface for it. Get a quick connect hose and adapter to connect it to the Nobo gas port.
-
Propane fire pit:
-
Bike rack: Mounting bike racks to the rear bumper is not recommended because people have had issues with the bumper falling off. The recommended rack Jack-it racks that mount to the tongue in front of the trailer.
-
RV patio mat: So you have a mat or rug for the area outside your Nobo.
-
Traction boards: To put under the tires if you get your truck stuck in mud or snow.
-
Drinking water purifier: In addition to the hose filter, to make purified drinking water people often use a drinking water purifying filer.
- PUR 11 Cup Filter Pitcher - Replacement filters with lead reduction are rated for 40 gallons each.
- Travel Berkey - It's expensive and takes up more space, but the filters are rated to last for as long for 6000 gallons, so it's cheaper that a typical filter pitcher in the long term. But their filters are not NSF/ANSI certified as most filters are, and some independent testing shows that their filters may not be as effective as they claim. But it still may be a good choice for long term use without having to frequently replace filters.
-
Camping Table
- ALPS Mountaineering Dining - Aluminum roll-up table. There are various other brands and sizes that of similar tables that are also good.
-
Tablecloth: Nice to have to put over campground picnic tables.
-
Second monitor for your laptop: This isn't really a trailer/camping item at all, but if you work from a laptop it can be really nice to add a second monitor to it.
- Portable Monitor 15.8'' USB C HDMI Display
- JSAUX FlipGo Portable Monitors - I love the FlipGo monitors to be able to have 2 extra screens to use with a laptop while working in the trailer. I got the FlipGo Pro 13.5".
-
Bug Racket: This is a must have for anyone who goes anywhere with flying bugs. Press the button and make contact with the bug and it's dead. It's like magic. We keep one in the trailer and at least two in the house.
Tools to Carry With you
(From the Forest River owner's manual) Phillips, square head, and regular slotted screw drivers, pliers and crescent wrench, a bubble level, open-end wrenches (that fit the water and gas line fittings), a tire pressure gauge, electrical tape and a flashlight.
Also: A shovel (for digging out stuck wheels, or sometimes needed to make the stairs level).
- Bottle jack - For maintenance, changing tires, etc.
- BIG RED Bottle Jack 6 Ton
- Tallboy Off-Road Bottle jack - Jack with enough height for "Beast Mode" Nobos.
How to Use It
Towing
(Not yet finished.)
- Trailer brakes: Adjust your truck's trailer brake gain settings. The recommended way to do this is to drive on a flat surface (maybe a large parking lot) about 20 MPH and fully squeeze the trailer brake. Try different settings until it's high enough that it's just a little under a level where the brakes lock-up. Note that the brakes are "self adjusting", and if the trailer is new you may need to drive it for a while before they fully work (and re-adjust the gain periodically).
- Tire pressure: Check trailer and tow vehicle tire pressure.
- Hitch ball grease: Hitch ball grease is recommended to extend the life of the ball hitch.
Water Heater
Before using the water heater the first time, check water heater bi-pass valves. Top and bottom valves open (valve handles parallel with water line and middle valve closed) before turning water heater on. The bypass valves are usually located inside a compartment inside the trailer.
Once water is running out of the cold and hot water faucets (this means your hot water tank has water in it), you need to turn on the hot water heater.
- Electric: Open the panel on the water heater on the outside of the trailer (just below the kitchen sink) and there’s and On/Off switch in the bottom left corner. It takes longer to heat the water on electricity, so be patient.
- Propane: Propane water heating is switched on with a switch inside the trailer. Make sure the propane is open fully at the tank. The first time you use it you'll need to light your stove and burn gas a little while to purge the lines. Turn off stove and then turn on propane switch and it will light up. Your water should heat up in a few minutes. Turn your faucet to hot and see if it's warm/hot. Caution: Before trying to heat the water with electric or gas, make sure your hot water tank is full of water.
You can have both propane and electric on for the hot water heater at the same time if you want it to heat the water as fast as possible.
Gas Stove
First make sure the stove vent fan flap is open. It has a flap on the outside of the trailer that can be opened and closed.
Older model Nobos don't have an igniter built-in, for those you have to light it with a regular lighter, plasma lighter, or flint striker. If you're using a lighter, start the flame, and then turn the nob to "lite" and light it and adjust the flame. If you're using a flint striker, turn the nob to "lite" and then quickly spark it to light the flame.
Outside griddle (grill)
The griddle/grill needs to be "seasoned" so it will be non-stick and not rust. A properly seasoned griddle will have a dark black slick coating on it. https://www.youtube.com/watch?v=ObfNehFs8Nw
Fresh Water Tank
Used to hold water if you're traveling somewhere without water hookups.
- Fill the tank and then open the inside faucets and shower to also fill the water lines (to hold more water in the lines) then close them.
Shower
- The shower of most Nobos has a "shower miser" device that can be used to save water when you're waiting for the water to get warm. Info here: https://www.youtube.com/watch?v=YLI1FXNur80
Refrigerator
-
https://www.youtube.com/watch?v=lDjTtylkxQk - Operating instructions.
-
Propane: (Nobos made before roughly 2022 had propane fridges, the newer ones are 12v DC) If it won't start on propane you may need to purge air out of the lines by starting a burner on the stove first. It will beep if there is air in the lines and it can't start on propane. It can take as long as 24 hours for it to completely cool down. If you need it to be cool faster, you can put frozen containers of water or cold things in it to cool it down faster.
-
Temperature sensor: Move the sensor in the back of the refrigerator up to set the temperature colder, move it down to set it warmer. https://www.youtube.com/watch?v=zKxyHkp61jg
Convection/Microwave Oven
- https://www.youtube.com/watch?v=_pMLwMOWpZo&t=48 - A good tutorial on how to use it.
Propane Tank
- Burn rate: Fridge uses about 1 to 1 1/2 pounds per day. Furnace use is about 1 1/2 pounds per hour. Water Heater about 1/2 pound per hour.
Furnace
- Smoke and a burning smell is normal for first time you use it. It's a good idea to temporarily take the battery out of the smoke detector before using it the first time.
Air Conditioner
- The air conditioner is quite noisy unfortunately. One tip, when it's on "auto" mode it will switch the fan off an on when the A/C kicks on. For sleeping, make sure it's not "auto", and that way the fan will stay on and not wake you up by switching off and on all night.
Retractable Awning
Be sure to roll it up completely any time there may be wind gusts, and always at night or any time you aren't at the trailer. There have been incidents of wind guts ripping the awnings, or tilting the trailer.
Outside Lights
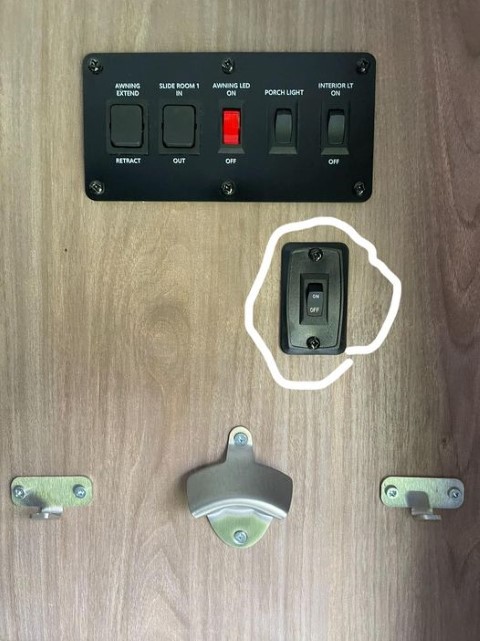
- Front lights strip switch: (Newer model Nobos may nto have a front light strip.) The switch for the front lights strip that newer year Nobos have is located next to where the switches are just inside the door, or on some models it's located inside the storage compartment. The switch isn't labeled.
Stairs
The stair length is adjustable with a pin that is in each stair leg. See https://www.youtube.com/watch?v=2HXb6UW7GV8. If the steps are up too high, this will often cause the door to not close properly. Bee Neat 2 Step Folding Stool is a great alternative to using the folding stairs (we removed our Nobo stairs and replaced them with this).
Tank Heaters
They're for use in freezing weather to keep the tanks from freezing. They're 12V so they will work on shore power or battery power. Make sure there is at least some water in the tanks before turning the heaters on to avoid possibly damaging the tanks from the heat.
Backing Up
Draining the Waste Water Tanks
Draining: Make sure the valves are still closed, open the drain cap, connect your sewer hose, drain the black water tank first, then the grey water tank.
Tank flushing: It's a good idea to use the "black tank flush" at least some of the time when you drain the black tank to clean the tank and to keep the black tank sensors clean so they work properly. Connect a hose to the black water flush port and flush the blank tank to clean it out. Make sure your black tank drain is open and flowing when flushing the tank so you don't overfill it and make a mess inside the trailer.
Finishing: Close the valves. Flush a toilet to add some water to the black water tank and add a dose of Happy Campers Tank Treatment or another tank treatment. People recommend that you always keep at least some water in the black tank because it's easier to keep clean if it doesn't dry up.
Winterizing
If you live in an area where the temperatures drop down to the mid to low 20s and you aren't heating the trailer, the freezing temperatures can freeze water in the pipes and fixures and cause damage. You should winterize it to keep the pipes from freezing.
- Forest River's Winterization Info Page - Not specific to Nobo trailers, but a useful guide.
- R-Pod RV Winterize Step-by-Step - Winterizing by blowing out the lines and also putting antifreeze into the lines (the most thorough method).
- General winterizing tutorial - Using RV anti-freeze.
Winterizing by blowing the lines out with an air compressor: (This is an optional method, you can just use RV anti-freeze instead.) Locate and open all the low point drains under the trailer and take off the caps to drain them. Put the caps back on and close the low point drains when they're done dripping. Open all faucets, hold flush valve on toilet open for a minute or so until no more water comes out. Close all the faucets. Hook compressed air fitting like this one that can also be used to pressure-test the plumbing to the "city water" hose connection. Set the compressor to 25-30 psi. Open all faucets one at a time, close when only air comes out of the spout. Hang down the shower head hose to drain. Remove compressed air fitting from water service. Add 1 pint of RV anti freeze to all drains and toilet. Put back the caps on the low point drains.
De-winterizing in the spring: Double check the antifreeze fill valve is closed. Hook it up to city water and run water through all the faucets until the water is clear. Open the low-point drain valve under the trailer until that water runs clear. Make sure there's no antifreeze in the fresh water tank.
Removing the Underbelly Covering
The underbelly of Nobos is covered with a corrugated plastic covering material (sometimes called "coroplast"), attached with rivets (they look like bolts but they aren't easily removed and can't be reinstalled). (Never model Nobos may have an underbelly that is now attached with screws!) To remove the underbelly covering you can use an impact wrench with a socket adapter that fits on the rivet head. Most of the rivets will break when you try to remove them. If there is part of the rivet still stuck in the hole, you can use a hammer and a nail-punch tool to punch them out of the hole. In some cases even that won't work and you may need to use a drill to drill a new hole next to the old one to use to reattach it.
To reinstall the underbelly, you can replace the rivets with screws and washers. For example Teks #9 1" screws with 1/4 x 1" stainless washers.
Water Leak Testing
If you suspect the trailer could have a water leak somewhere, for example if it was in freezing weather and it wasn't winterized, there is info about how to pressure test the water system here using a device that you can buy here.
Using a Jack / Changing a Tire
If you need to change a tire or lift a wheel off the ground to grease the bearings or any other reason, if you have a 2-axle model you can just drive it up on to blocks set under one of the wheels. That will lift the other wheel off the ground.
If you have a 1-axle model or need to use a jack, here is how you can do that. A bottle jack, such as a a 6 ton bottle jack is a good choice. From the manual: "To avoid damage to your RV, be sure the jack is placed firmly against the chassis frame and place it as close to the spring hangers as possible." What that means is the jack goes under the frame (the square metal that runs around the whole trailer, as close as you can reasonably put it to where the wheels/axle is.
Note: If tyou have Beast Mode suspension, the process may be different.
Battery Shut-off Switch
The battery shut-off switch is a red square shaped on/off switch that is usually located on the outside front of the trailer somewhere near the batter. It disconnects the battery from the trailer (except solar charging, which is always connected to the battery). You can leave it on at all times, except you should turn it off if you're storing the trailer long term at a location where it can't be plugged in to maintain the battery charge.
Solar Power
Factory-installed roof solar option
- GoPower charge controller GP-PWM-10-SQ, WECO 1000W inverter WF-5110R, 110W panel (I think its GoPower). The charge controller is limited to 10 amps, so you can't add panels to the roof without also upgrading the charge controller. (Note: Newer model Nobos may have a 30 amp controller.)
Maintenance
-
Axle grease:
-
Grease information and instructions: https://www.facebook.com/groups/NoBoOwners/permalink/1839827162821372/
-
Axle greasing is required every 12 months or 36,000 miles, whichever occurs first.
-
There are mixed opinions on whether there is enough grease on the axle bearings when they come from the factory.
-
"Get a 14oz tube of grease, a grease gun, a 6 ton bottle jack from Walmart (or jack from the truck). Place the bottle jack just in front or right behind the axle. Snap off the cap and peel off the removable rubber seal, grease it with a grease gun, and reinstall seal and cap. Bearing manufacture states you should rotate the tire as you put grease in."
-
"I called Lippert, The company that manufactures the axles. They confirmed they do not fill the cavity between the bearings with grease. Advise not to grease through the Zerk fitting until you see grease coming out. They said if you feel that cavity up with grease. The grease could try to migrate out through the back seal if it’s ruptured. They recommended physically repacking bearings once a year or every 36,000 miles." [source]
-
Lubricating the Super Lube Axle Hub - How to grease the axle using the Zerk fitting.
-
Valvoline Moly-Fortified Gray Full Synthetic Grease - An example of a grease that can be used. The manufacturer recommends a "lithium complex" grease, and this one is full synthetic which means it lasts longer and at higher temperature than ones that aren't full synthetic. Also available from AutoZone.
-
Grease gun - Used to inject the axle grease.
-
-
Water tank: Sanitize the water tank with half a cup of bleach before the initial use, and at least once a year after that. See the owner's manual for specific instructions on the sanitizing process.
-
Hot water heater: (Note: Some newer Nobos may have a water heater without an anode rod, so this may not apply to yours if there is no anode rod!) Once a year flush out sediment from the tank and check the anode rod. The purpose of the anode rod is that the metal in it slowly dissolves into the water and that helps to protect the hot water tank from corroding. Anode rod changing and tank cleaning instructions: https://www.youtube.com/watch?v=RT--DdYf4UI.
-
1 1/16" deep socket to remove and re-insert the anode rod.
-
Teflon tape to wrap around the threads before re-inserting it.
-
Water Heater Tank Rinser Wand - Useful to help flush sediment out of the tank. Connect to a hose and stick it into the hole where the anode rod was and move it around to flush it out.
-
Anode rod - Replacement rods if the old one has dissolved.
-
If there is a lot of build-up inside the tank (you can use a flashlight to look inside), you may want to also flush it with vinegar to remove deposits. See https://www.youtube.com/watch?v=-74CQxa5BLU for specifics. Summary of the steps:
- Set the valves to bypass the water heater so it's isolated from the plumbing (just as you do when winterizing it).
- Use the PVC pipe device (see the video) to fill the Nobo's 6 gallon water heater with 3 gallons of vinegar, and 3 gallons of water. Clean any vinegar off the side of the trailer if it gets vinegar on it.
- Let it sit overnight.
- Drain the tank and flush it out with the tank rinser wand.
-
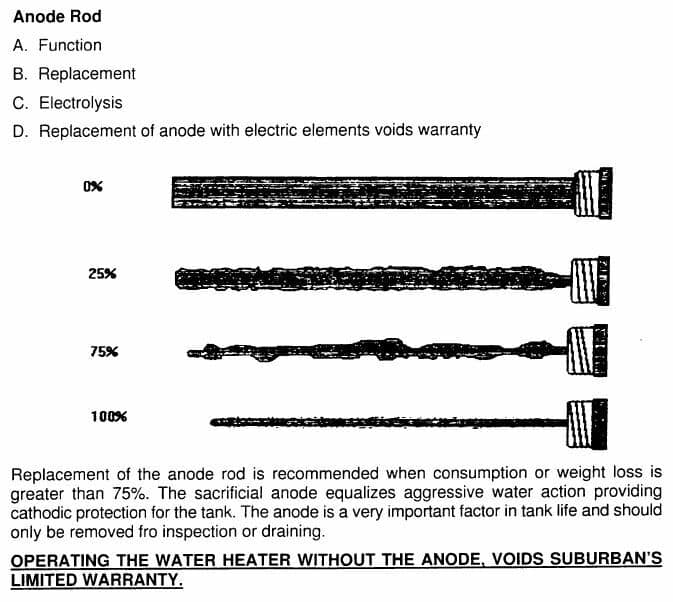 The anode rod doesn't need replacement until there is almost no metal left on it.
-
Roof: Inspect the roof carefully for any signs that the sealant around any of the penetrations is starting to crack or come off. If so, use Dicor self-leveling sealant.
-
Brakes: Check/adjust trailer brakes.
- The manufacturer (Lippert) recommends brakes be adjusted every 3,000 miles.
- Brake adjustment video
Misc Parts Supplies
- Pelland Enterprises - This is a distributor of various RV parts. Including the type of window latches that are used in Nobos.
Solutions to Common Issues
-
Door is difficult to close:
- If the stairs are out, make sure the stairs are all the way down. Sometimes people have to dig around the feet of the stairs to get them to sit all the way down.
- Check to make sure the hinge screws are screwed in all the way.
- The strike plate may have been installed upside down, or may need adjusting. In some cases the door may close more easily if the strike plate is just removed.
- Check the hinge bolts/screws to make sure they aren't lose.
-
Shower drain cracking:
- The shower floor has more flex then the pipe and coupler. [source]
- "You can remove the vent cover under your shower to see the problem area." "My 16.5 leaked from the same place. The shower floor flexes a bit. The dealer repaired the crack and added some floor bracing. But that leak came out under the floor of the shower onto the trailer floor only while the shower was being used."
- "Fernco 1059-150 from supplyhouse.com worked for me. 1 1/2” hub x 1 1/2” pipe (which went on the threads of the strainer). My ABS nut/female swivel also cracked and didn’t notice it at first." [source]
-
110V outlets aren't working: Check the GFCI to make sure it wasn't tripped (most common cause). Then check the fuses (located under the fridge). If you have an inverter, check to see if it needs to be reset.
-
Black/gray tank lever came off: Buy a replacement handle.
-
Fresh water tank is filling with water from the city water connection: A check valve that is allowing city water to enter fresh water tank. Turn off city water, turn on your 12 volt water pump, and run some water. Hopefully its just a piece of dirt or junk that will dislodge and check valve starts working correctly.
-
Refrigerator not working on propane: (for older Nobos with a propane fridge) "Always make sure that you bleed air from your propane lines when you turn the tank on/off and when switching new tanks. I had issues with my fridge staying lit and turning on using propane, and after using the burners on the stove for 5 min was able to fix it. Ive also manually lit it with a bbq lighter after opening the outside access panel and lighting the pilot light when it doesn't want to stay on. Same issue when water heater doesn't want to kick on either." [source]
-
Refrigerator alarm going off: Make sure the door is closed all the way.
-
Refrigerator not working at all: It can take hours for it to cool down, make sure you give it plenty of time. It helps if there is something in the fridge for it to cool (such as a container of water). Move the sensor in the back of the refrigerator up to set the temperature colder, move it down to set it warmer https://www.youtube.com/watch?v=zKxyHkp61jg. It may have a reset switch depending on the model. https://www.youtube.com/watch?v=HNaIm8slsgg&t=98s
-
Upper cabinets don't stay open: There should be devices in the upper cabinets to hold the flip-up doors open. Some Nobos may be missing these. [Info]
-
Low water pressure: If you have low water pressure when using the water pump from the tank, check the water pump filter to see if it may be clogged.
-
Faucets putting out little water, mostly air when using the fresh water tank: Your winterizing valve is probably slightly open so it’s sucking in air. At the water pump there is an inlet hose for winterizing solution/antifreeze. Find where the pump is and ensure the winterizing antifreeze valve is turned so that it cannot suck in air.
-
Water running out from the underbelly after rain: Water tends to collect in the underbelly covering when it rains, and it'll later drain out when you tilt the trailer. Check the underbelly for any sagging, which may indicate water is collecting under it. If so, you'll need to drill small holes in the underbelly lining to let it drain. You should also seal the front edge of the underbelly with silicone caulk because that is water tends to enter it.
-
Match the cabinet stain color:
- If you want to get wood to match the existing cabinets, someone said they used "red oak with a gray stain from Lowe's" to stain it to a similar color. Another post says a good match for them was Varathane wood stain "Briarsmoke" color.
- If you want a paint with a similar color for trim pieces, etc, Glidden Max "Chocolate Pretzel" color and a close match and is available at Home Depot.
-
Carbon monoxide detector or smoke detector going off: If a detector is going off when there is no smoke or CO, it probably needs a new battery.
-
Broken cabinet support strut: The cabinet support struts can be replaced with ones such as these.
-
Fiberglass/Exterior Maintenance/Repair: For info on repairing damage to the Azdel exterior shell, see https://azdelonboard.com/diy-care-repair/.
General RV Info
Campsites
- RV Parky - Directory of all types of camping locations.
- Campendium - Directory of all types of camping locations.
- FreeCampsites.net - Free campsite location directory.
- Boondockers Welcome - Stay for free on land owned by other people. They do charge a small yearly fee (or you can use it for free if you also host people on your own land).
- Hipcamp - Directory of a variety of various types of camping/parking locations, mostly camping on privately owned land.
- Harvest Hosts - Stay at wineries, breweries, and farms for free for one night at a time (with a yearly fee to join the website). It's a neat idea, but they keep on raising the price, so it's not as good a value as it once was. It's questionable if it's still worth the price since they're just giving you access to a list of information (the money you pay doesn't go to the property owners). But it may be worth it if you stay at a few of their hosts.
- RV Overnights - This is basically the same thing as Harvest Hosts, but with a much lower membership fee. They have fewer hosts, but the price makes it worth joining even if you only stay at one or two of their hosts.
- Sanidumps Dump Station Locations - Guide to sewer dump station locations.
As an Amazon Associate I earn from qualifying purchases through links on this page.
Questions/suggestions/corrections/comments? Contact me at nobo@meplanet.net.